
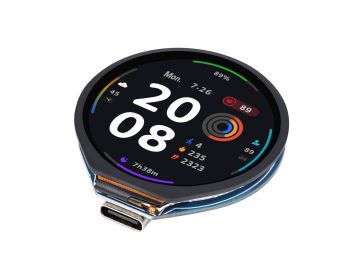
01 / Project overview
The ESP32-S3-Touch-LCD-1.28 combines a 240 × 240 circular display with a CST816S touch controller and QMI8658 IMU. This project uses display and touch only. Bring those two parts up independently before adding timer state or motion gestures.
02 / Materials & software
| Item | What to check |
|---|---|
| ESP32-S3-Touch-LCD-1.28 | Confirm the exact 1.28-inch touch model. |
| USB-C data cable | Keep the first version USB powered. |
| Arduino or MicroPython environment | Use one documented workflow consistently. |
| Small stand | Support the board without pressing on the screen. |
03 / Connections & first setup
No external display wiring is required. Keep the vendor’s onboard SPI and I2C assignments unchanged. Use the board’s documented USB flashing procedure, and avoid adding a battery while the first display and touch tests are still being debugged.
04 / Build the project
- Check the display example
Run the vendor example and inspect color, rotation, and the circular boundary. Confirm the full image fits before trying custom fonts. Save the working configuration and dependency versions.
- Check touch coordinates
Run the touch example and tap the center and several edge positions. The touch-only example may not illuminate the LCD; use its serial output to verify events rather than assuming the screen should draw a response.
- Define one primary action
Show START while idle, PAUSE while running, and RESUME while paused. Place a smaller reset action away from the primary target. Make the timer state explicit in text.
- Keep time independently
Use a monotonic time source for elapsed duration. Update the countdown from elapsed time, not from the number of display refreshes. Apply a single transition for each deliberate touch so a held finger does not rapidly toggle states.
- Test screen rotation
If you rotate the layout, verify touch mapping again. Try a short countdown, pause it, resume it, and allow it to finish. Keep IMU gestures as a later extension after touch behavior is dependable.
Timer states
IDLE -> START -> RUNNING
RUNNING -> PAUSE -> PAUSED
PAUSED -> RESUME -> RUNNING
RUNNING -> time elapsed -> COMPLETE
05 / Check the result
| Check | Expected behavior |
|---|---|
| Center target | One tap produces one state transition. |
| Pause | Remaining time stays unchanged. |
| Rotation | Touch and graphics remain aligned. |
Troubleshooting. A lit display and a working touch bus are separate milestones. If touch events arrive in the wrong place, inspect coordinate transformation rather than moving buttons to compensate. Keep display initialization from the exact board example, because a generic round-screen driver may omit required setup.
06 / Sources & build notes
Prepared by PineMux from the official sources above. These are editorial build instructions; this project has not been bench-tested by PineMux. The cover shows reference hardware or a source project; image credit is provided above. Use the manufacturer’s revision-specific diagrams for exact wiring.