
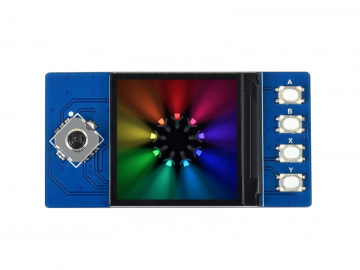
01 / Project overview
This build adapts the Pico-LCD-1.3 display example into a desk timer. The module has a 240 × 240 IPS panel driven through SPI. Keep the manufacturer’s display initialization and input mapping intact while you develop the timer as a separate piece of application logic.
02 / Materials & software
| Item | What to check |
|---|---|
| Pico-LCD-1.3 | Use the Pico module, not the similarly named Pi HAT. |
| Raspberry Pi Pico | Fit headers suitable for the module. |
| USB data cable | Power and program the first prototype by USB. |
| Computer with development tools | Use the environment required by the selected official demo. |
03 / Connections & first setup
Align the Pico’s header orientation with the module’s labels before applying power. Start from the exact Pico-LCD-1.3 demo so its SPI and button pins are correct. Avoid assigning an extra peripheral to a GPIO already used by the screen or controls.
04 / Build the project
- Prove screen and buttons
Run the official display demo and its input test. Verify every button you intend to use. Record the demo version before editing; a known-good display program is your quickest recovery point.
- Define three actions
Use one button to start or pause, one to reset, and one to change the preset while idle. Write these rules down before coding. A reset should require a deliberate action rather than happen on every repeated key event.
- Track elapsed time
Calculate remaining time from a monotonic clock and stored elapsed time. Do not decrement a counter merely because a screen redraw completed. A slow frame or a long button press must not change the meaning of one minute.
- Design one simple screen
Keep the remaining time large, add a small state label, and show the preset only when useful. Draw only changed regions if the driver supports your chosen method. Keep touchless buttons easy to operate beside the display.
- Verify a short cycle
Use a ten-second development preset to test completion, then compare a longer cycle with a separate clock. Pause halfway through and check that resumed time excludes the pause.
Application logic — pseudocode
remaining = duration - accumulated_running_time
START: store monotonic start time
PAUSE: add elapsed interval to accumulated time
RESET: clear accumulated time and return to IDLE
05 / Check the result
| Check | Expected behavior |
|---|---|
| Pause | The displayed remaining time stops changing. |
| Resume | The timer continues from the paused value. |
| Completion | One completion event occurs; time does not become negative. |
Troubleshooting. If the timer drifts, inspect timekeeping before optimizing graphics. If inputs repeat unexpectedly, handle press transitions and debounce them. Keep the manufacturer’s pin definitions in one place so changing application states cannot accidentally reconfigure the display.
06 / Sources & build notes
Prepared by PineMux from the official sources above. These are editorial build instructions; this project has not been bench-tested by PineMux. The cover shows reference hardware or a source project; image credit is provided above. Use the manufacturer’s revision-specific diagrams for exact wiring.